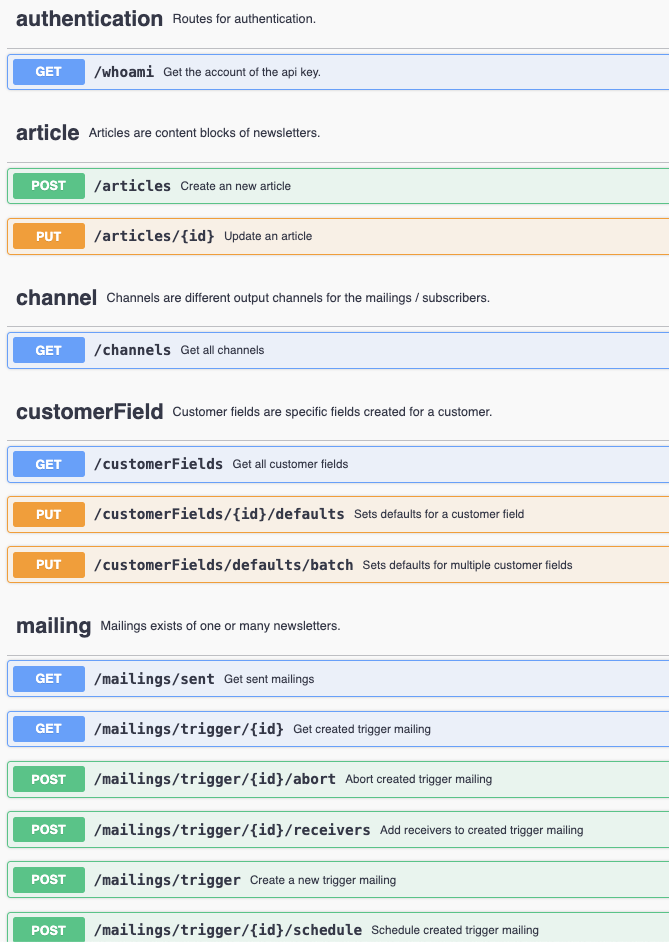
API Reference
Getting started
Introduction
The mail2many API provides external programs access to mail2many data and functionality. It allows developers to integrate mail2many in their website or own application. The API can be used for a lot of different use cases, from a simple forwarding of the website registrations to complex subscriber sync, everything is possible.
To use the mail2many API, you need access to an mail2many account. Once you have an account and are logged-in, you can create an API key and begin making calls to the API.
REST
The mail2many API generally follows the REST conventions:
- Different resources are available like
subscribers
ormailings
- HTTP methods are used for actions like
GET
orPOST
- Requests must send data generally in the
JSON
- Responses are generally in the
JSON
The mail2many API only supports data exchange in the JSON
. XML or simple POST parameters are not supported due to the scope and maintainability.
It is advisable to transmit the two headers "Content-Type:application/json" and "Accept:application/json" to ensure best communication.
Endpoint documentation
We are using the OpenAPI Specification to describe our endpoints.
URL
The url of the API is https://{server}-api.mail2many.de/api/v1/
where {server} corresponds to the server of your account. For example if your server is 127
the API endpoints for your accounts
are available at https://127-api.mail2many.de/api/v1/
The automatic generated endpoint documentation is available at /documentation
. For the server 127
it is available at https://127-api.mail2many.de/api/v1/documentation.
The endpoint documentation describes all available endpoinnts annd it also allows testing our enndpoints directly.
Authentication
You must authenticate requests using your API key. Users can generate and manage multiple API keys within their mail2many account. An API key is always linked to a mail2many account where it was created.
The key grant access to an mail2many account and should therefore be treated as passwords. External applications should always store the keys in a theft-proof manner and ensure that they are not visible anywhere.
To make an request use the HTTP basic authentication and send the API key as password. The API lets you use any string as the username. Use the API key as password.
curl --request GET \
--url 'https://{server}-api.mail2many.de/api/v1/' \
--user 'anystring:YOUR_API_KEY'
Data exchange
As already mentioned the data is exchanged usually in JSON
.
Request
The request body must be send as JSON
. Every endpoint requires different data, which data can be found in the endpoint documentation. Please note that the example requests contain every available field, plz
scheck the Schema if a field can be nullable and is therefore not required.
An example body could like the following:
{
"email": "florian.reichart@atrivio.de",
"lastname": "Reichart",
"firstname": "Florian",
"genderId": 1,
"sendOptIn": true
}
Response
The response has an http status code and the body is usually send as JSON
. Which data the endpoints are returning is described in the endpoint documentation.
An example respose could like the following:
Status: 200
{
"id": 1,
"email": "florian.reichart@atrivio.de",
"status": 2,
"statusAddition": 1,
"genderId": 1,
"languageIso": "de",
"firstname": "Florian",
"lastname": "Reichart",
"company": null,
"street": null,
"postcode": null,
"city": null,
"phoneNumber": null,
"birthday": null,
"optInComment": null,
"optInSent": true,
"createdAt": "2021-01-22 10:28:00",
"updatedAt": null
}
Advanced
Introduction
In this section same advanced topics are presented.
Dates
All dates are returned in the format YYYY-MM-DD HH:MM:SS
and are UTC (Universal Time Coordinated). You have to tranform it into your desired timezone.
2021-01-22 10:28:00
Filtering
The mail2many API allows you to filter the results for certain endpoints. This can be done with the help of the search parameter. This parameter must always be a JSON. All contained filters are linked with AND, the values within a filter are linked with OR.
search=[
$key: $value
]
search=[
$key: [
$firstValue,
$secondValue
]
]
search=[
{
$key: {
"condition": $condition,
"value": $value
}
}
]
The following conditions are available:
Wert
|
Beschreibung
|
---|---|
= | Für exakte Werte (default) |
like | Suche mit dem Like-Operator |
> | Suche für größer |
>= | Suche für größer gleich |
< | Suche für kleiner |
<= | Suche für kleiner gleich |
Sorting
The mail2many API allows you to sort the results for certain endpoints. This can be done with the help of the sorting parameter. This parameter must always be a JSON. All contained sortings are executed one after the other.
sorting=[
{
$key: $order
}
]
sorting=[
{
$key1: $order1
},
{
$key2: $order2
}
]
The following conditions are available:
Wert
|
Beschreibung
|
---|---|
asc | Aufsteigend sortieren |
desc | Absteigend sortieren |
Pagination
Some endpoints use pagination. This can be recognised if a meta.pagination field is present in the response. By default 10 entries are delivered. This can be overwritten by passing the parameter limit. With the help of the parameter page, it can be determined which page is to be delivered. How many pages are available in total can be checked in meta.pagination.
?limit=20&page=1
{
"meta": {
"pagination": {
"total": 40,
"count": 20,
"perPage": 20,
"currentPage": 1,
"totalPages": 2,
"links": {
"next": ""
}
}
}
}
Errors
In the event of an error, the mail2many API returns a meaningful error message. In addition to a readable error message, an error code is also always delivered. A http status code for the request is delivered as well.
The following errors exist in general. For individual errors check the endpoint documentation.
Code
|
Title
|
Description
|
---|---|---|
1000 | Unknown error | Something unexpected happened. |
1001 | Internal error | An internal error occurred. |
1002 | Validation failed | The given data was invalid. |
1020 | Error getting resource | The given resource could not be found. |
1021 | Error creating resource | The new resource could not be created. |
1022 | Error updating resource | The given resource could not be updated. |
1023 | Error deleting resource | The given resource could not be deleted. |
1024 | Resource already existing | The given resource is already existing. |
1025 | Resource is locked | The given resource is locked and cannot be updated. |
Invalid data
If invalid data is transferred, an error message in the following format will be returned. The field errors
contains all fields which werer invalid and the reason why they are invalid.
{
"status": "error",
"code": 1002,
"message": "The given data was invalid.",
"errors": {
"email": [
"The email must be a valid email address."
],
"firstname": [
"The firstname must be a string."
]
},
"statusCode": 422
}
Resource already existing
If an entry is already existing the error message looks like the following.
{
"status": "error",
"code": 1024,
"message": "The resource is already existing.",
"errors": [],
"statusCode": 409
}
Fault tolerance
When using our API, keep in mind that sometimes errors or exceptions can occur. To ensure that your integration works reliably, you should always catch API errors and exceptions.
If an endpoint returns an error, you should log the call in as much detail as possible. Ideally, you should save the transmitted data and the received data including the header information. This way, you can later understand what happened and, if necessary, make the request again.
Large data volumes
Please note that mail2many sometimes has to work with large amounts of data. In this case, requests may take longer. Set your timeout accordingly.
For loading data it is better to work with a sensible pagination. For creating or updating data it can be useful to not to transfer too much data at once. For example, if you want to synchronise subscribers, do not send 10,000 recipients in one request, but make 10 requests with 1000 recipients each.
Also check how often you need to make certain requests. Sometimes hourly requests are necessary, other times one request per day would be enough. With this you can help mail2many to be less busy.
Variables
Introduction
In mail2many it is possible to upload your own HTML. In this HTML, so-called variables can be printed. A distinction is made between simple variables and variable areas.
Die Variablen und variablen Bereiche können mit dem Testversand getestet werden. Hierbei werden auch Daten des Empfängers verwendet, sofern der Empfänger im Account vorhanden ist.
The following variables are available.
Id
|
Name
|
Example
|
Subscriber field
|
---|---|---|---|
1 | Salutation | Herr, Frau Mr., Mrs. Monsieur, Madame |
genderId |
2 | Firstname | Erika | firstname |
3 | Lastnname | Mustermann | lastnname |
4 | City | München | city |
5 | Age | 35 | birthday |
6 | Formal Salutation | Sehr geehrter Herr, Sehr geehrte Frau Dear Mr., Dear Mrs. Cher Monsieur, Chère Madame |
genderId |
7 | erika.mustermann@example.com | ||
8 | Individual Salutation | Hello Erika | salutation |
Simple variables
The simple variables must be inserted with the help of an ID and should have a default value. This value is used if the variable cannot be replaced for the subscriber. A separate default value must be set for each variable.
The variables must be inserted in the following form:
{{V:ID
:DEFAULT
}}
{{V:4
:Germany
}}
{{V:2
:}}
Variable areas
The other possibility is to work with variable areas. Here you can define whole text areas and each area can contain plain text as well as multiple variables. Each area has to have a unique area number and a fallback. If one of the variables in the area cannot be replaced for the subscriber, the default value is used. This variant is more flexible because you can combine text and multiple variables.
Attention: In this case, you have not to define a default for each variable, which is why the syntax is a little different.
The variable areas must be inserted in the following form. Make sure that keep the area number unique:
[[A:-:AREA-NUMBER
:-:TEXT
:-:DEFAULT
]]
[[A:-:1
:-:Hello {{V:1}} {{V:3}}
:-:Hello
]]
[[A:-:2
:-:Greetings to {{V:4}}
:-:Many greetings
]]
Customer fields
Introduction
In mail2many it is possible to define individual fields for every customer. These fields can be created by us as a customer request. Every field gets an unique id and has a field and data type.
There are two different field types: Subscriber and Account. While the subscriber fields can be set for ever single subscriber, the account field can only be set once in an account. Examples for a customer field could be their favourite country or if they are VIP subscriber. An account field could for example be the company name.
These are the two available field types:
- subscriber
- account
Additionally every field has one of the following data types:
- string
- integer
- date
- boolean
Saving
The subscriber fields can be saved in every subscriber request within the key customerFields
. You must use their correct id and pass the correct data types. In this example we have these 4 fields:
- Favourite country (string)
- Number of booked trips (integer)
- Last trip (date)
- VIP subscriber (boolean)
The request could look the the following:
{
"email": "florian.reichart@atrivio.de",
"customerFields": {
"1": "Nepal",
"2": 2,
"3": "2018-06-01",
"4": true
}
}
The accounts fields must be saved directly in the account. There is a special route for saving the default value, check the customer field section. This could look like the following:
{
"value": "My Company name"
}
Usage
The customer fields can be used in the same way variables can. The only different is that C
must be used instead of V
.
Please check the following examples:
{{C:1
:Europe
}}
The customer fields can also be used in the variable areas and be combined with variables.
[[A:-:1
:-:Hello {{V:1}} {{C:3}}
:-:Hello
]]
Own pages
Introduction
In mail2many it is possible to store own pages for opt-in confirmations and unsubscriptions for an account. The aim is for a subscriber to be able to confirm and unsubscribe in a familiar environment.
Confirmation page
With a own confirmation page you can present your subscribers a familiar environment after he confirmed the opt-in. The confirmation itself still takes place in mail2many, the unsubscribe page only functions as a target page. This way the register and confirmation pages can be on the same website.
Prepare page
First, the confirmation page must be implemented. The confirmation page must be a publicly accessible HTML page to which mail2many can redirect when an opt-in is confirmed. The page itself can be implemented with an accompanying programming language.
The page should be on the same domain as the sender address. If you send your newsletter with newsletter@atrivio.de, for example, the confirmation page should be on the domain atrivio.de.
When someone wants to confirm the opt-in, mail2many forwards to the external page and passes one parameters in the url:
Name
|
Description
|
---|---|
valid | Indicates if the opt-in was valid and the subscriber was confirmed |
id | An encrypted Id of the subscriber (currently not used) |
The unsubscribe page must evaluate the valid
parameter. If it has the value "true" as a string, then the confirmation has been done and a confirmation page should be displayed.
If this is not the case and the value is "false" as string, then the subscriber was too late and the opt-in was no longer valid. In this case, the subscriber should be informed that the confirmation could not be done and he has to subscribe again.
The entire process could look like this:
- The subscriber registers on your website.
- mail2many sends him a opt-in mailing with a validity of 7 days
- The subscriber confirms the opt-in within the 7 days by clicking the button in the mail
- mail2many confirms the subscriber and redirects him to your page with
valid=true
- You show the subscriber a cofirmation page
If the subscriber would confirm after 7 days, mail2many would not confirm him and redirect him to your page with valid=false.
A simple PHP code could look like this:
Store page url
The second and last step is to set up the confirmation page in the respective account. This can be done very easily in the "Settings" area. The link to your page for can be stored there under "Opt-In and Opt-Out".
Two different pages
If you want to create a page for successful registrations and a separate page for expired registrations, this is also possible. You can store two pages under "Opt-In and Opt-Out".
Unsubscribe page
With a own unsubscribe page you can present your subscribers a familiar environment to unsubscribe. The unsubscription itself still takes place in mail2many, the unsubscribe page only functions as an intermediate page and forwards the subscriber to mail2many. This way the unsubscription can be on the same website as the registration.
Attention
If the unsubscribe page is not available or not working correctly, the subscribers cannot unsubscribe from your account. Make sure the connection is setup correctly.
Prepare page
First, the unsubscribe page must be implemented. The unsubscribe page must be a publicly accessible HTML page to which mail2many can redirect when an unsubscription occurs. The page itself can be implemented with an accompanying programming language.
The page should be on the same domain as the sender address. If you send your newsletter with newsletter@atrivio.de, for example, the unsubscribe page should be on the domain atrivio.de.
When somebody wants to unsubscribe, mail2many forwards to the external page and passes three parameters in the url:
Name
|
Description
|
---|---|
unsubscribed | Indicates whether unsubscription has been performed or not |
p | An encrypted parameter that contains the mail2many data to unsubscribe |
id | An encrypted Id of the subscriber (currently not used) |
The unsubscribe page must first evaluate the unsubscribed
parameter. If it has the value "true" as a string, then the unsubscription has already been done and a confirmation page should be displayed.
If this is not the case and the value is "false" as string, then the subscriber wants to unsubscribe. In this case, a page where he can confirm the unsubscription should be displayed. If the subscriber confirms, for example, with a button, he must be forwarded back to the mail2many. The mail2many parameter p
and the parameter force=true
must be transferred to tell mail2many to unsubscribe him now.
Then mail2many will unsubscribe him and him redirect back.
The entire process could look like this:
- The subscriber clicks the unsubscribe link in the newsletter
- mail2many redirects him to the your unsubscribe page and appends the parameters
- The subscriber is shown a page to confirm due to
unsubscribed=false
- The subscriber clicks a "Confirm" button
- The subscriber is redirected back to mail2many with the parameter
p
andforce=true
and unsubscribed there - mail2many redirects the subscriber again back to the unsubscribe page and appends parameters to it
- Recipient is shown the confirmation of unsubscription due to
unsubscribed=true
A simple PHP code could look like this:
Store page url
The second and last step is to set up the unsubscribe page in the respective account. This can be done very easily in the "Settings" area. The link to your page for can be stored there under "Opt-In and Opt-Out".